New integrated email marketing tools for Gmail
Google has introduced new features for sending professional-looking newsletters and other types of branded bulk email in Gmail. While only available to Workspace Individual users initially, these features are now rolling out to most Google Workspace customers. See the Availability section in this post for more details.
The new options consist of two features:
Gmail newsletter templates and layouts
This feature allows you to select from a set of predefined email templates and customize them. You can add logos, images, text elements, buttons, links, and footer text. Moreover, you can change the color scheme to align with your brand colors.
The layout editor isn't as powerful as some dedicated newsletter sending products out there, like Mailchimp or Sendinblue. For example, it doesn't have a drag and drop editor that would allow you to re-arrange the different sections of your layout. But then again, the predefined templates are plentiful and should be more than enough to cover most use cases. And let's not forget, unlike paid products like Mailchimp, the new Layouts feature comes free with your Google Workspace subscription.

Multi-Send for bulk mail sending
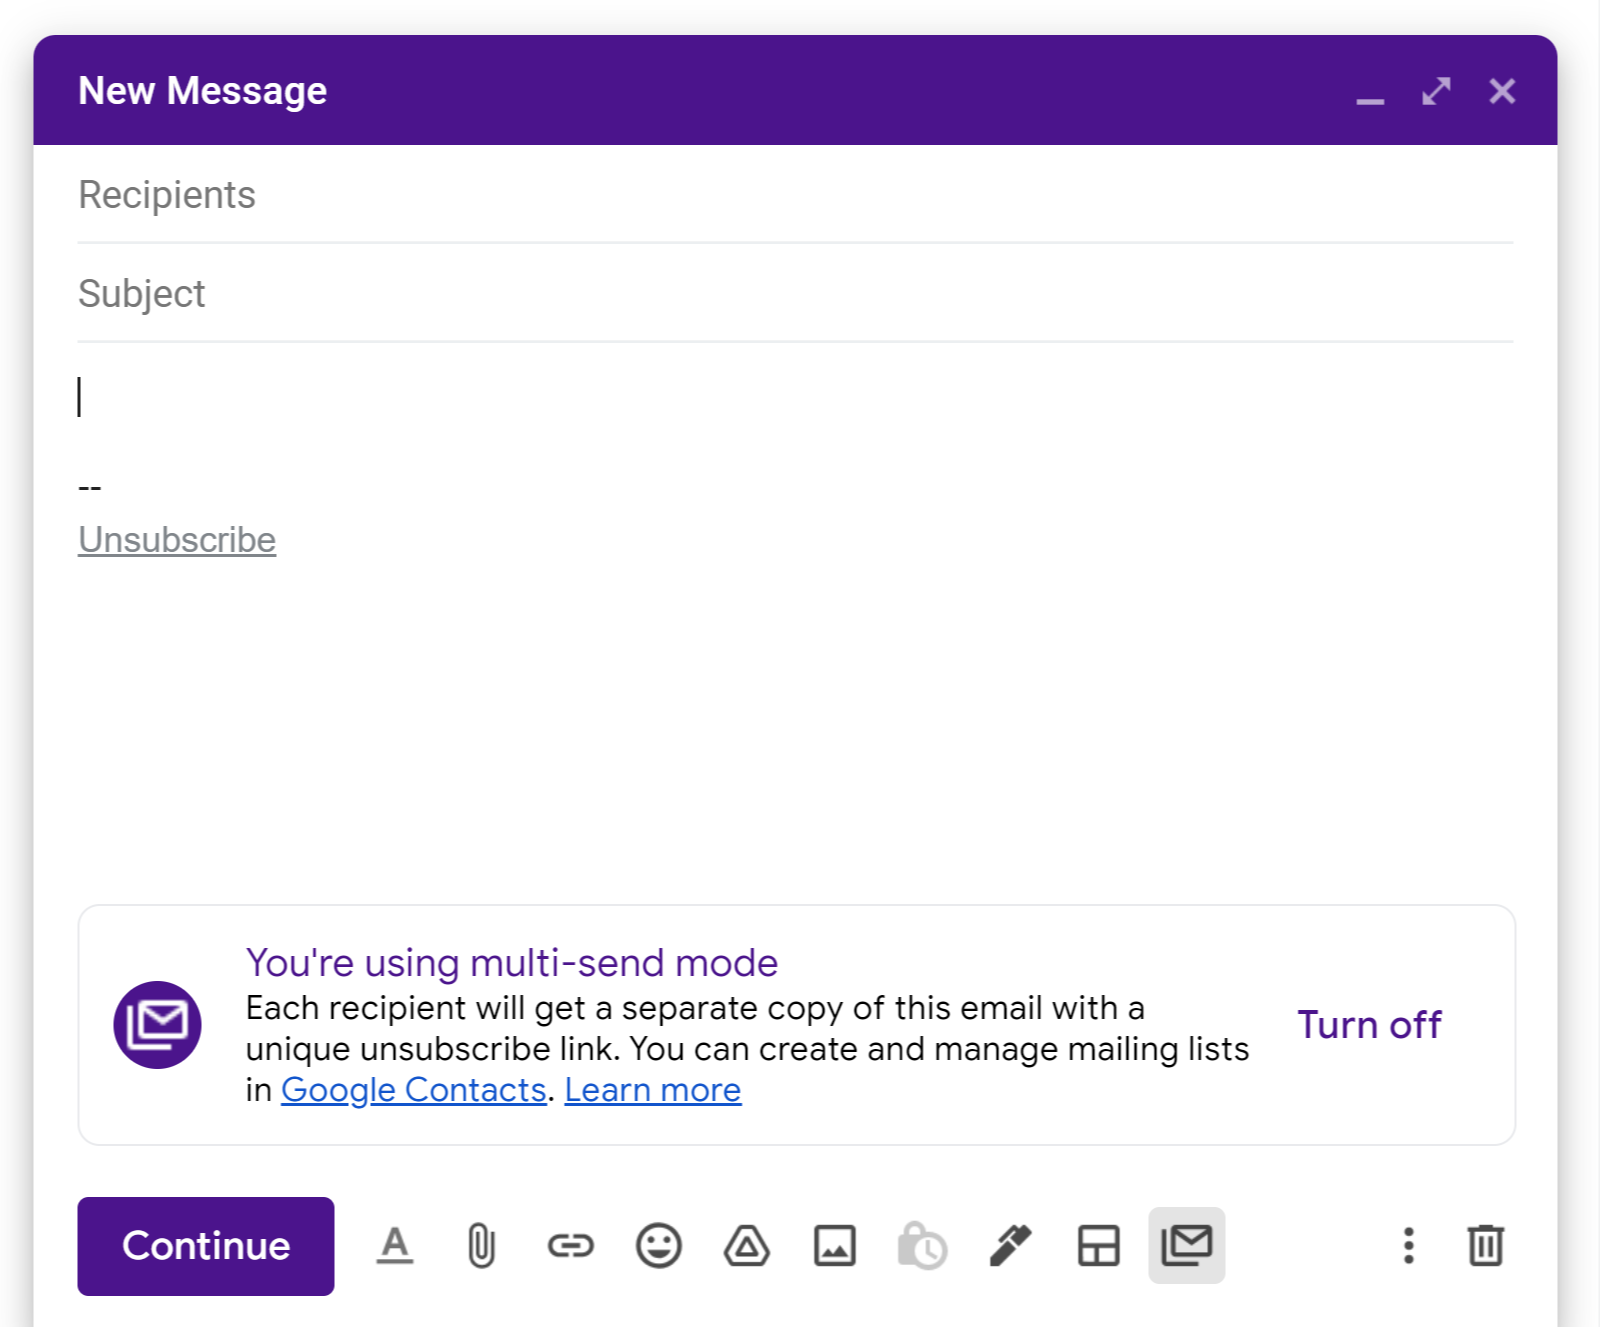
Once you have created some nice layout templates in Gmail, you can use the new Multi-Send feature to send newsletters or similar bulk mail to large sets of contacts or mailing lists. For example, your customers or prospects in your lead pipeline.
The nice thing about this is that you don't have to BCC each recipient in the email editor. Instead, Google sends out an individual copy to each recipient automatically. You must create a mailing list in Google Contacts and add that as a recipient. See detailed instructions below.
Furthermore, Google will add an unsubscribe link to each email so that you can stay compliant with GDPR laws and allow your recipients to unsubscribe.
Note that you don't necessarily have to use a layout template to use Multi-Send. You can use Multi-Send with regular emails, as well. But the combination of the two features makes this a compelling solution for sending out professional-looking marketing emails.
How to create a newsletter in Gmail
Let me show you how to create an email newsletter in Gmail. Follow these steps:
1. Create a contact list with labels in Google Contacts
First, you need to define a set of contacts you want to send your newsletter to. Currently, Gmail only supports Google Contacts as your source for contacts. So ideally, you already have all your contacts stored there. You can also import contacts from other sources (see below).
Now you need to create a label in Google Contacts. It will serve as a container for all contacts you want to email. Give the label an appropriate name that corresponds with your intended actions. Something like "Newsletter Recipients," "Workshop Attendees," or "New Signups."
Once you have created the label, it's time to assign it to all the contacts you would like to send emails to. To add contacts, click on the checkbox next to their name and then either:
- Drag the selected contacts onto a label in the sidebar, or
- From the toolbar above the selected contacts, click the Manage labels icon and assign the label you just created.
Importing contacts
You can import large amounts of contacts stored in other tools (like your CRM) if that tool allows you to export your contacts in CSV or vCard formats. If you have a list of contacts stored in a CSV file or as vCards, import them like this:
- Click on "Import" from the sidebar to import a CSV / vCard file of external contacts.
- Select the custom label that you want to apply to each imported contact from the import window. Here you would choose the label you have just created.
2.) Create an email template in Gmail
This is where the new Layout feature comes into play. If you want to know how to add an email template in Gmail, follow the steps described below. Creating templates is simple:
- Go to Gmail
- In the top left corner, click the compose button
- At the bottom of the compose window, click on the Layouts button
- If you haven't used Layouts before, click on Customize Styling
- Enter relevant details to customize your design. You can add:
- Logos
- Colors
- Fonts
- Images
- Footer Details
- Links - After you are happy with your new design, click Save and continue. Note that style changes only apply to your new template. Tip: In the footer section, you can add details about your business, like name and contact information.
- Now select one of the predefined layouts to apply your new design to.
- Clicking Insert will add your customized layout to the email.
With the layout applied to your email, you can now go ahead and add images, buttons, and text to the design or remove sections you don't want. Here are some suggestions:
- If you add a button to your email, don't forget to add a link to it
- If you add images, you can add alt text as best practice (for screen readers, for example)
To change an image in the email:
- Click the image > Change image.
- Select an image.
- Click Next.
- Crop the image as needed.
- Click Insert.
3. Send your email to the contact group (label)
Once you are satisfied with the layout, design, and content, it's time for mail merge:
- Fill out the subject line
- In the To: line, enter the name of the contact label you previously created in Google Contacts. Every contact with that label will get a copy of your mail.
- Click Continue. Note that a warning will appear if you have removed the unsubscribe link from your template. To add the unsubscribe link back into your email, click Add link.
- A confirmation box will appear with the number of recipients who have unsubscribed.
- You can optionally click "Send preview" to send a test email. This lets you preview what your mail looks like on the recipients' end.
- To send your email, click Send all.
Congratulations! You have just sent your first Multi-Send email with a professional-looking, customized template in Gmail.
4. Find your sent emails
After you send out a Multi-Send email, you can find it in your Sent folder in Gmail. It will have a banner that will let you quickly identify Multi-Send mails.
Note that you will only see one email, regardless of how many recipients you emailed. This is because the individual emails sent to each recipient are automatically moved to the Trash folder. This avoids clutter in search results and the Sent folder.
Availability and rollout pace
Multi-Send and Gmail Layouts will start rolling out to Rapid Release customers beginning August 8th, 2022. It can take up to 15 days for complete feature visibility. Customers on the Scheduled Release train will receive the update on August 22nd (a 15-day gradual rollout).
- Available to Google Workspace Business Standard, Business Plus, Enterprise Starter, Enterprise Standard, Enterprise Plus, Education Standard, Education Plus, Nonprofits, Workspace Individual, and legacy G Suite Basic customers
- Not available to Google Workspace Essentials, Education Fundamentals, Education Teaching & Learning, Business Starter, Enterprise Essentials, and Frontline customers, as well as legacy G Suite Business customers
Additional resources
- Google Help: Create branded emails with customized layouts
- Google Help: Use multi-send for email marketing, newsletters, and announcements


